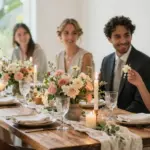
Planning a wedding can be both exciting and overwhelming, especially when it comes to the details. One aspect that often stands out is the dessert table. You might find yourself dreaming of a stunning wedding dessert table that not only satisfies your sweet tooth but also impresses your guests. The right display can serve as a focal point, creating an atmosphere of elegance and charm. That’s why I’ve put together this collection of 15 elegant wedding dessert table ideas that beautifully blend aesthetics with deliciousness.
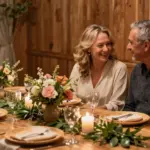
If you’re someone who loves the idea of a rustic chic wedding or simply wants to elevate your wedding sweets presentation, this post is for you. You may be aiming for a memorable experience that reflects your personality and style, and a well-designed dessert table can help achieve that. From unique wedding treats to luxury dessert tables, you’ll find inspiration that resonates with your vision and taste.
In this guide, you’ll discover a range of dessert table ideas that are not only visually appealing but also offer delightful flavors. Whether you’re planning a small, intimate gathering or a grand celebration, these elegant dessert displays will make your wedding day even more special. Get ready to wow your guests with stunning treats that they won’t forget!
Key Takeaways
– Discover 15 elegant wedding dessert table ideas that fit various styles, from rustic to luxurious.
– Learn how to create an impressive dessert display that serves as a beautiful focal point at your wedding.
– Explore unique wedding treats like mini pastries, themed cupcake towers, and artisan gelato stations.
– Find practical tips for presenting desserts in a way that enhances both taste and visual appeal.
– Get inspired to personalize your dessert table to reflect your style, making your wedding memorable for you and your guests.
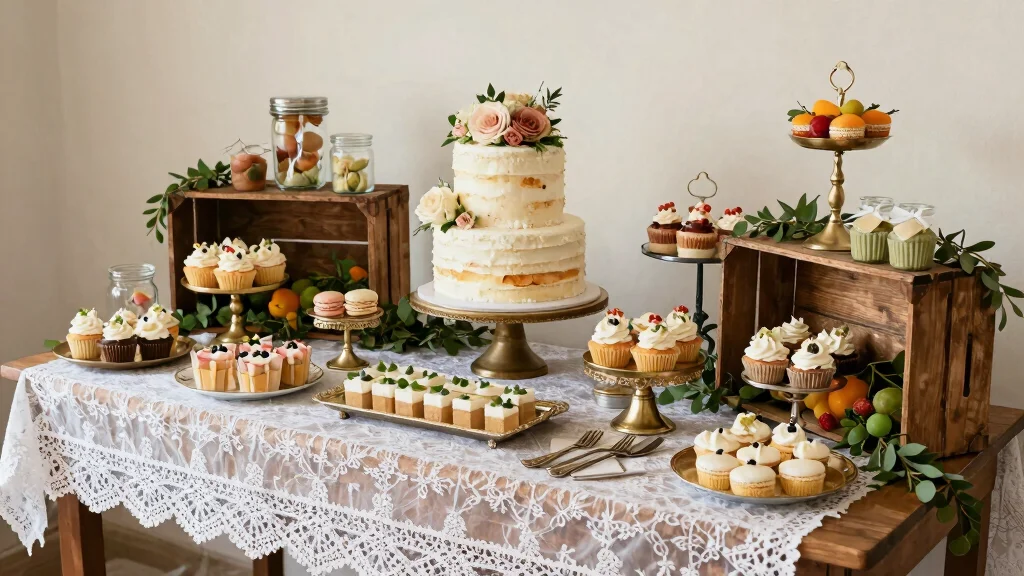
1. Elegant Tiered Cake Display

Craving a stunning centerpiece for your wedding dessert table? An elegant tiered cake is not just visually appealing, but it also offers a variety of flavors and textures for your guests to enjoy. Choose a multi-tiered cake frosted with smooth buttercream or fondant and adorned with fresh flowers, fruits, or intricate sugar art for that wow factor.
Not only does this setup create a focal point, but it also allows for smaller cakes or cupcakes to be displayed at different heights, enhancing the visual interest. Vintage or ornate stands can add a touch of sophistication, while a color palette that complements your wedding theme ensures each layer brings delightful surprises.
Ingredients:
– 4 cups all-purpose flour
– 3 cups sugar
– 1 cup unsalted butter
– 8 eggs
– 2 cups whole milk
– 3 teaspoons vanilla extract
– Baking powder, salt, and desired flavorings (like cocoa powder or lemon zest)
Instructions:
1. Preheat the oven to 350°F (175°C).
2. Grease and flour your cake pans.
3. In a mixing bowl, cream the butter and sugar until fluffy.
4. Add eggs one by one, mixing well after each addition.
5. Alternate adding flour and milk into the mixture, followed by vanilla.
6. Pour into prepared pans and bake for 25-30 minutes.
7. Cool before frosting and decorating with flowers or edible decorations.
FAQs:
– How far in advance can I bake the cake? You can bake your cakes up to a week ahead and freeze them.
– What’s the best frosting to use? Buttercream works well for smooth finishes and intricate designs.

Your Party's Sweet Companion: You will receive a set of 8 wooden cake stand risers (available in 4 sizes), 8 wooden signs and 2 pens, enough quantity and different sizes to...
Elegant Tiered Cake Display
Editor’s Choice


2. Rustic Dessert Bar with Jars

Looking for a fun and interactive dessert option for your wedding? A rustic dessert bar featuring jars can engage your guests and create a memorable experience. Fill mason jars with delightful treats like layered cakes, pies, or parfaits, allowing guests to mix and match their favorites.
A backdrop of reclaimed wood or burlap enhances the rustic charm, while mini spoons or forks provide easy access. Don’t forget signage to label each sweet treat, and consider incorporating local flavors or seasonal fruits for a fresh twist.
Ingredients:
– 2 cups of your favorite cake (crumbled)
– 2 cups whipped cream or yogurt
– 1 cup fresh fruits (like strawberries or blueberries)
– 1 cup chocolate or caramel sauce
Instructions:
1. Start with a layer of crumbled cake at the bottom of each jar.
2. Follow with a layer of whipped cream or yogurt.
3. Add a layer of fruits, followed by another drizzle of sauce.
4. Repeat layers until jars are filled to the top.
5. Top with a dollop of whipped cream and a sprinkle of nuts, if desired.
FAQs:
– Can I prepare these jars in advance? Yes! They can be made a day ahead and refrigerated.
– What’s a good alternative for cake? Crumbled cookies or granola are great alternatives.
A rustic dessert bar with mason jars makes your wedding dessert table elegant and interactive—guests mix and match pies, layered cakes, or parfaits. Add a burlap backdrop, labeled signage, and easy-access spoons to boost accessibility and keep the charm intact for a memorable, share-worthy moment.
What You Need: Are you on the search for a special and exquisite way of displaying cupcakes? From now on, any wedding, anniversary or birthday party is going to be more fun with the modern stylish cupcakes stand that will create an amazing display for your dessert, it is ease of use and comfortability.

Upgrade Your Party Display with Our Sturdy 4-Tier Cupcake Stand! This versatile wooden cupcake display stand is expertly crafted from four solid square shelves (12", 10", 8", 6") connected by a central metal tube, offering a spacious and stable cupcake holder stand for up to 24 cupcakes. Unlike flimsy 400g plastic risers, our 3.5-lb wooden structure ensures no wobbling or bending. Each thick, detachable wooden board allows for flexible assembly to fit your space

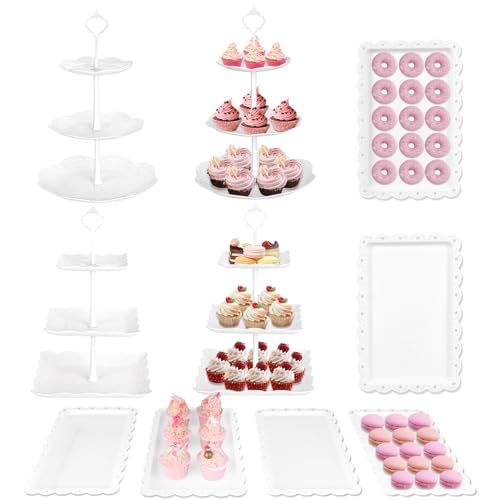
【Complete Serving Set】Get everything you need in one pack! Includes 3 sturdy 3-tier round stands, 3 square 2-tier stands and 4 large rectangle trays - ideal for displaying desserts, snacks or party favors.
Rustic Dessert Bar with Jars
Editor’s Choice
![Wide Mouth Mason Jars 16 oz with Lids [6 Pack], Canning Jars with Metal ...](https://m.media-amazon.com/images/I/815tipUxlyL._AC_UL320_.jpg "15 Wedding Dessert Table Elegant Ideas That Impress Guests 13")
![SEWANTA Wide Mouth Mason Jars 32 oz [4 Pack] With Mason Jar Lids and Ban...](https://m.media-amazon.com/images/I/71G8P3ESzjL._AC_UL320_.jpg "15 Wedding Dessert Table Elegant Ideas That Impress Guests 15")


3. Chocolate Fountain Extravaganza

If you’re searching for a dessert that screams indulgence, a chocolate fountain is the answer. This interactive dessert station lets guests dip fresh fruits, marshmallows, and pretzels into warm, flowing chocolate, creating a deliciously decadent treat. Enhance the presentation with fresh strawberries, bananas, and assorted dippables arranged in charming trays.
Offering a variety of chocolate—dark, milk, and white—ensures there’s something for everyone. Adding decorative elements like flowers or themed decorations around the fountain elevates the experience, making it both tasty and visually stunning.
Ingredients:
– 4 lbs of chocolate (milk, dark, or white)
– 1 cup vegetable oil
– Fresh fruits (strawberries, bananas, pineapples)
– Marshmallows, pretzels, and cake pops for dipping
Instructions:
1. Melt the chocolate in a microwave or double boiler, mixing in vegetable oil until smooth.
2. Pour the melted chocolate into the fountain base and turn it on.
3. Arrange the dippables around the fountain.
4. Ensure guests have skewers or forks for dipping.
FAQs:
– How long will the chocolate stay melted? It can stay melted for about 3 hours with proper heating.
– Can I use different types of chocolate? Absolutely! Mixing chocolates can create unique flavors and experiences.

Detailed Dimensions: This 3-tier cupcake tower is crafted from premium sturdy plastic, featuring trays with diameters of 6/8/10 inches and 4 MM extra thickness for enhanced durability. The total height measures 14 inches after full assembly, and it can securely hold up to 18 small standard cupcakes

【High Quality and Stable】: Our cupcake stand is composed of 0.2 inch acrylic plate and 1 inch diameter acrylic pillar, the sturdy large base keeps your cupcakes from wobbling. This is a beautiful, safe and durable product.

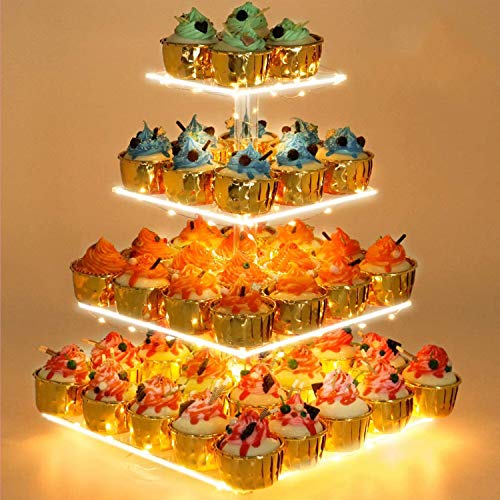
【Size】The layer sizes range from 12x12'' to 6x6'', ensuring that each cupcake or treat has a perfect spot. The entire stand reaches a height of 15.7 inches, with each layer having a height of 4.7 inches. Each layer is crafted from high-quality 4mm thick Acrylic Plate
Cost Breakdown & Budget Planning
Planning a wedding dessert table can be exciting, but it also requires careful budgeting. Let’s break down the costs so you can create an elegant dessert display without overspending.
Cost Breakdown by Category:
– Materials/Products: Expect to spend between $300 to $1,200 for cakes, pastries, and sweets, depending on your choices.
– Tools/Equipment: If you need to rent or purchase items like tiered stands or dessert tables, budget around $50 to $300.
– Labor/Professional Installation: Hiring a professional to set up your dessert table might cost between $150 to $600, depending on their services.
– Optional Extras: Decorations, signage, or custom items can range from $50 to $500. Consider this if you want to add special touches.
Budget Tier Breakdown:
Basic Economy Tier $
– What’s included: This tier includes a simple cake, basic sweets, and minimal decor. Think of a single-tier cake and a few cookie platters.
– Good for: Couples on a tight budget or those planning a small wedding.
– Limitations: You miss out on variety and may not impress those with a sweet tooth.
Mid-Range Tier $$
– What’s included: This balanced option features a beautiful tiered cake, assorted pastries, and some decor to create an elegant display.
– Good for: Most couples who want a decent selection without breaking the bank.
– Best value for: Those who want to impress guests but need to stick to a reasonable budget.
Premium Tier $$$
– What’s included: This tier has everything—luxurious cake options, gourmet treats, and stunning decor. Expect tiered displays and customized sweets.
– Good for: Couples wanting a high-end experience for their guests.
– Worth it if: You desire a unique and memorable dessert table that stands out.
Money-Saving Tips:
– DIY Decor: Get creative and make some decor yourself. This adds a personal touch and saves money.
– Seasonal Ingredients: Use seasonal fruits and flowers to cut down on costs and keep your desserts fresh and elegant.
– Limit Flavors: Choose a few popular dessert flavors instead of trying to please everyone. This reduces costs and simplifies planning.
– Buy in Bulk: Purchase sweets or decorations in bulk to take advantage of discounts.
Where to Splurge:
– Quality Ingredients: If you’re splurging anywhere, it should be on high-quality ingredients for cakes and pastries. This ensures that everything not only looks good but tastes amazing.
– Presentation: Invest in beautiful displays and serveware. An elegant presentation can elevate even simple desserts, making them look luxurious.
– Custom Treats: Consider unique sweets that fit your theme. Custom macarons or personalized cookies can make a big impact and are worth the extra cost.
With this cost breakdown and budget planning guide, you can create a stunning wedding dessert table that impresses your guests while staying within your budget. Happy planning!

All-in-one Ice Cream Party Supplies Kit: this 77-piece set includes 30 x 4 oz ice cream cups with spoons, 4 lidded topping bowls with spoons, 2 zinc alloy scoops, 1...
4. Mini Pastry Assortment

Craving a variety of elegant bites? Mini pastries are the perfect choice for your wedding dessert table, offering guests a delightful selection of flavors and styles. From eclairs to tartlets, these bite-sized treats can be beautifully arranged on tiered platters or decorative trays, allowing guests to pick and choose their favorites.
Consider flavors that represent you as a couple or that match your wedding theme. Personalizing some pastries with initials or symbols adds a special touch, ensuring each guest can savor a different taste while enjoying the elegant presentation.
Ingredients:
– 2 cups puff pastry dough
– 1 cup pastry cream
– Assorted fruits and chocolate for filling
– Icing sugar for dusting
Instructions:
1. Roll out the puff pastry and cut into small rounds or shapes.
2. Bake according to package instructions until golden brown.
3. Once cooled, fill with pastry cream or desired filling.
4. Top with fresh fruits or chocolate drizzle.
5. Dust with icing sugar before serving.
FAQs:
– What’s the best way to store mini pastries? Keep them in an airtight container in the fridge.
– Can I prepare them in advance? Yes, they can be made a day ahead and filled the morning of the event.

【120 PCS Mini Cake Boards】Package includes 60 pcs 3.15’’ and 60 pcs 3.5’’ mini cake boards, suitable for displaying desserts of different sizes. Sufficient number of small cake boards to meet your daily baking needs as well as large events. They are practical baking tools and party supplies

Package Content:You will receive 100 plastic hinged food containers that can be used for the preservation of burgers,salads,sandwiches and other foods.Make sure your food is fresh.

Elegant Visual Appeal | Premium Gold Finish - Elevate your desserts to professional standards with our shimmering gold mini cake boards. The bright, reflective finish adds a touch of luxury to any mousse, cupcake, flans, or pastry, making your creations the center of attention at weddings, banquets, or upscale parties
5. Rustic Cheesecake Display

If you’re looking for a creamy contrast to traditional wedding desserts, think about serving cheesecakes in unique ways. Mini cheesecakes in jars or individual tartlets topped with fresh fruits and drizzles of caramel or chocolate maintain that rustic charm while giving guests a rich dessert experience without being overwhelming.
Choose different flavors like classic vanilla, berry, or chocolate to cater to all tastes. You could create a cheesecake tower with varying heights, each adorned with unique toppings, ensuring everyone finds something they enjoy.
Ingredients:
– 2 cups crushed graham crackers
– 1/2 cup melted butter
– 4 cups cream cheese
– 1 cup sugar
– 4 eggs
– 2 teaspoons vanilla extract
– Toppings: fresh berries, chocolate shavings, caramel sauce
Instructions:
1. Preheat your oven to 325°F (160°C).
2. Mix crushed graham crackers and melted butter, then press into the base of mini tart pans.
3. Beat cream cheese and sugar until creamy.
4. Add eggs and vanilla, mixing until combined.
5. Pour into prepared crusts and bake for 20-25 minutes.
6. Allow cooling, then top with fruits or sauces.
FAQs:
– How long can mini cheesecakes be stored? They can last up to 5 days in the fridge.
– Can I freeze cheesecakes? Yes, but make sure they are wrapped tightly.

TOWER DISPLAY: 3 tier cupcake stand size (16.02in*12.08in*18.5in). The cupcake stand is extra large and holds 52 cupcakes up to 2.5 inches in diameter, making it an easy solution for even large family parties.The dessert stand for the dessert table is perfect for birthday celebration, Christmas celebration, get-together, wedding party etc.

【All-in-One Wooden Tiered Riser Display Stands+Event-Ready】Cologne organizer for men on vanities, display stands cabinets for collectibles figures in living rooms, display succulents in bedrooms, or 4 tier wood spice rack organizer in kitchens. Switch from daily use (grazing table supplies) to events – create social-media-ready wooden dessert table display set at parties, buffet risers and stands, or boost candle display for vendors booth must haves
6. Decorated Sugar Cookies

Looking for a fun and customizable dessert? Decorated sugar cookies are a delightful option for any wedding dessert table. Each cookie can be transformed into a piece of art that reflects your wedding theme or colors, with shapes ranging from hearts to flowers and initials decorated with royal icing or edible paints.
Setting up a cookie decorating station where guests can create their own masterpieces adds an interactive element, keeping everyone entertained while they await the main festivities. Plus, offering small takeaway bags for guests to take their creations home adds a sweet reminder of your special day.
Ingredients:
– 2 3/4 cups all-purpose flour
– 1 teaspoon baking soda
– 1/2 teaspoon baking powder
– 1 cup unsalted butter, softened
– 1 1/2 cups sugar
– 1 egg
– 1 teaspoon vanilla extract
– Royal icing for decorating
Instructions:
1. Preheat your oven to 375°F (190°C).
2. In a bowl, cream together the butter and sugar.
3. Beat in the egg and vanilla until well combined.
4. Gradually blend in the flour, baking soda, and baking powder.
5. Roll into balls, flatten, and place on baking sheets.
6. Bake for 8-10 minutes until golden.
7. Once cooled, decorate with royal icing.
FAQs:
– Can I use store-bought icing? Yes, store-bought icing can work well for quick decorating.
– How can I store leftover cookies? Keep them in an airtight container to maintain freshness.

Complete 3-IN-1 Dessert Table Display Set – Elevate your event with this all-in-one cupcake stand set, including two 3-tier square stand (13.4" height), two round stand (13" height), and 6 large rectangular trays (14.5"x9.3"). The square stands hold 16 cupcakes each, the round stands hold 12 each, and the rectangular trays hold 72 in total, offering a combined capacity of 128 cupcakes. With sturdy trays and reinforced pillars, this display set is perfect for birthdays, weddings, baby showers.

【Rustic Tiered Dessert Stand】Use it to embrace the rustic charm and create a warm, inviting atmosphere that complements your celebrations. The stylish design of the dessert stands add a touch of elegance to any setting, effortlessly highlighting your culinary creations or decorative accents. Whether it's cupcakes, cookies, fruits, finger foods or quirky decorations, this stand is your go-to for showcasing desserts or decorative items with effortless charm. Be the talk of the party with our dessert display stands!
Installation Note: When installing the largest bottom tray and connecting rod, you must press the screw under the plate tightly, so that it is firmly fixed to the tabletop, and then tighten the connecting rod so that the chassis will stabilize the entire cake stand without shaking. Repeat the same operation 3 times to assemble. Our tiered cupcake tower are made of extra thick reusable plastic, extra large tray and extra thick posts provide superior texture and stability
Decorated Sugar Cookies
Editor’s Choice


7. Elegant Fruit Tart Display

Want to add color and freshness to your wedding dessert table? Fruit tarts are not only delicious but also visually striking. An elegant fruit tart display features a variety of tarts filled with creamy custard and topped with seasonal fruits, creating a delightful and refreshing treat for your guests.
Using different sizes for visual interest and flavor variety can elevate the appeal. Picking fruits that complement your wedding colors and garnishing with edible flowers adds an artistic touch, ensuring your dessert option stands out during the warmer months.
Ingredients:
– 1 1/2 cups all-purpose flour
– 1/2 cup sugar
– 1/2 cup butter, softened
– 1 egg
– 1 cup pastry cream
– Assorted fresh fruits (berries, kiwi, mango)
Instructions:
1. Preheat your oven to 350°F (175°C).
2. Combine flour, sugar, and butter to form a dough.
3. Press into tart pans and bake until golden.
4. Let them cool completely before filling with pastry cream.
5. Arrange fresh fruits over the top and refrigerate until serving.
FAQs:
– Can I make these tarts ahead of time? Yes, but it’s best to add fruits a few hours before serving.
– What other fruits can I use? Almost any fruit works, but berries and citrus are popular choices.

Material and Size: This cupcake tower is made of high-quality corrugated cardboard. The smooth surface makes this cupcake stand easy to clean with soft cloth. Small tier 6.3 in, medium tier 9.1 in, large tier 11.8 in

WHAT YOU NEED: This 6 tier large cupcake stand is a good choice as a decoration for any wedding, anniversary,birthday party or baby shower, this is going to be more fun with the western stylish cupcakes stand that will create an amazing display for your dessert.

【Superior Quality】:This dessert table display set is crafted with thicker food grade plastic plates and reinforced metal rods. It boasts a stylish and durable construction in excellent workmanship that will impress your guests
8. Themed Cupcake Tower

If you’re aiming for a fun and stunning display, consider a cupcake tower for your wedding. This elegant setup allows you to showcase a variety of flavors, making it easy for guests to indulge in their favorites. Choose a design that aligns with your wedding theme, using cake stands or tiered displays to create height and interest.
Decorate each cupcake with unique toppings that reflect your style; think floral accents, edible glitter, or themed cake toppers. Guests will appreciate the chance to enjoy individual portions while choosing from a delightful variety, ensuring a memorable dessert experience.
Ingredients:
– 2 cups all-purpose flour
– 1 1/2 cups sugar
– 1 cup butter, softened
– 4 eggs
– 1 cup milk
– 2 teaspoons baking powder
– Flavorings of your choice (vanilla, chocolate, lemon)
Instructions:
1. Preheat your oven to 350°F (175°C).
2. Cream together the butter and sugar until fluffy.
3. Add eggs one at a time, mixing well after each.
4. Gradually add flour, milk, and baking powder until batter is smooth.
5. Fill cupcake liners and bake for 20-25 minutes.
6. Let cool and decorate with frosting and toppings.
FAQs:
– How can I keep cupcakes fresh? Store them in airtight containers at room temperature.
– Can I freeze cupcakes? Yes, but frost after thawing for best results.
A themed cupcake tower adds wedding dessert table elegant vibes and fun without crowding plates. Pick a design that matches your wedding theme, showcase flavors, and finish cupcakes with floral accents or edible glitter to make guests linger for seconds.
9. Rustic Pie Table

If you want to bring a cozy, homey feel to your wedding dessert table, consider a rustic pie table. Featuring an assortment of seasonal pies, beautifully arranged on wooden crates or vintage cake stands, this setup is sure to delight your guests. From classic apple and pecan to unique flavors like blueberry lavender, there’s something for everyone.
Add personalized pie labels to enhance the rustic vibe and let guests know what to expect. Small portioned slices or mini pies can keep things tidy and easy for guests to serve themselves. Don’t forget a scoop of ice cream or whipped cream for that extra indulgence.
Ingredients:
– 2 1/2 cups all-purpose flour
– 1 teaspoon salt
– 1 cup unsalted butter
– 6-8 apples (Granny Smith and Honeycrisp)
– 3/4 cup sugar
– 1 teaspoon cinnamon
Instructions:
1. Preheat your oven to 425°F (220°C).
2. In a bowl, mix flour and salt; cut in butter until crumbly.
3. Add water as needed to form a dough; roll out for crust.
4. Slice apples and mix with sugar and cinnamon.
5. Fill pie crust with apple mixture, cover with top crust.
6. Bake for 45 minutes or until golden brown.
FAQs:
– How can I keep pies fresh? Cover with a clean cloth to maintain moisture.
– Can I prepare pies a day in advance? Yes, but they are best served warm.

Mini Size: 9.40X9.40X1.50cm/3.69X3.69X0.59Inch. These mini gold food trays are perfect for serving individual portions at any gathering

Package Includes: 200PCS Mini disposable Cardboard Cake Bases. about 3.15 inch(8cm) in diameter.

Gold rectangular cake cardboard - made of eco-friendly paper material, 100% food safe and healthy, grease proof and frozen enduring, disposable and recyclable
10. Unique Flavored Macarons

Searching for a chic dessert to impress your guests? Macarons are small, colorful, and elegant, making them a perfect addition to any wedding dessert table. With a wide range of flavors and colors, you can create a stunning display that fits your wedding theme. From classic vanilla and raspberry to unique flavors like lavender or matcha, guests will love the variety.
Arrange macarons in a tiered display or decorative boxes for a whimsical touch. Adding personalized flavors that represent you and your partner will create a unique experience, ensuring these delicate treats leave a lasting impression.
Ingredients:
– 1 cup almond flour
– 1 3/4 cups powdered sugar
– 4 egg whites
– 1/4 cup granulated sugar
– Flavorings and food coloring of your choice
Instructions:
1. Preheat your oven to 300°F (150°C).
2. Sift almond flour and powdered sugar together in a bowl.
3. In a separate bowl, beat egg whites until foamy; gradually add granulated sugar until stiff peaks form.
4. Gently fold in the dry ingredients and desired food coloring.
5. Pipe the mixture onto a baking sheet lined with parchment paper.
6. Let them sit for 30 minutes, then bake for 15-20 minutes.
7. Cool and fill with your favorite ganache or buttercream.
FAQs:
– How long do macarons last? They can last up to a week in an airtight container.
– Can they be frozen? Yes, they can be frozen and thawed before serving.
Unique Flavored Macarons
Editor’s Choice


11. S’mores Station

Want to add a playful yet classy element to your wedding dessert table? A s’mores station is perfect! Set up a rustic wooden table with all the ingredients: graham crackers, marshmallows, and a selection of chocolates. Include a small fire pit or a torch so guests can roast their marshmallows to perfection.
This interactive dessert option creates a cozy atmosphere, encouraging guests to have fun and engage with each other. Offering different chocolate options, like milk, dark, or flavored varieties, adds an exciting twist. Pair this with charming signage to guide guests through the process.
Ingredients:
– Graham crackers
– Marshmallows
– A variety of chocolates (milk, dark, flavored)
Instructions:
1. Set up the table with ingredients arranged nicely.
2. Provide skewers for roasting marshmallows.
3. Instruct guests to roast marshmallows and assemble their s’mores.
FAQs:
– Can s’mores be made in advance? The ingredients can be prepped, but they’re best assembled fresh.
– How do I keep the marshmallows warm? Use a small, controlled heat source to keep them warm for roasting.
Bring a rustic chic twist to your wedding dessert table elegant vibe with a S’mores Station that feels both playful and refined. Guests roast marshmallows, swap stories, and savor chocolate options like milk and dark, turning dessert into warm, memorable moments.
12. Whimsical Donut Wall

Looking for a trendy and visually appealing way to display donuts at your wedding? A donut wall does just that! This unique idea offers a variety of flavors while serving as an attractive decor piece. Mount wooden boards or frames where donuts can be hung with hooks or pegs, showcasing colorful sprinkles, glazes, or filled options for a stunning visual array.
Guests will love the interactive experience of picking their favorite donut flavors. Pair the display with labeled tags for each flavor, ensuring everyone can find their preferred treat. Offering coffee or milk alongside will perfectly complement the sweetness.
Ingredients:
– 2 cups all-purpose flour
– 1 cup sugar
– 2 tsp baking powder
– 1/2 tsp salt
– 3/4 cup milk
– 2 eggs
– Assorted toppings (sprinkles, icing)
Instructions:
1. Preheat oven to 375°F (190°C).
2. Mix flour, sugar, baking powder, and salt in a bowl.
3. In another bowl, combine milk and eggs; then mix with dry ingredients until smooth.
4. Pour batter into a donut pan and bake for 10-12 minutes.
5. Cool and decorate with your choice of toppings.
FAQs:
– How long do donuts stay fresh? They are best consumed within 2 days but can be stored in an airtight container.
– Can I make donuts ahead of time? Yes, donuts can be made a day in advance and kept fresh.
13. Artisan Gelato Station

Want to bring a delightful twist to your wedding dessert table? An artisan gelato station is perfect, especially during warmer months. Offer a selection of gelato flavors made with fresh ingredients, served in charming cups or cones. Incorporating a rustic cart or wooden table adds to the aesthetic and charm.
Pair the gelato with toppings like fresh fruits, nuts, or sauces, allowing guests to customize their desserts. Including popular flavors such as vanilla, chocolate, and seasonal specialties caters to all preferences, creating a fun and memorable experience for everyone.
Ingredients:
– 2 cups whole milk
– 2 cups heavy cream
– 1 cup sugar
– 4 egg yolks
– Flavorings (vanilla extract, chocolate, fruit purees)
Instructions:
1. In a saucepan, combine milk, cream, and sugar over medium heat.
2. In a bowl, whisk egg yolks and slowly add warm milk mixture.
3. Return to the saucepan and cook until thickened.
4. Cool the mixture, then churn in an ice cream maker.
5. Freeze until firm before serving.
FAQs:
– How long can gelato be stored? It can be kept in the freezer for about 2 weeks.
– Can I have non-dairy options? Yes, use coconut or almond milk for delicious alternatives.
14. Cupcake Decorating Station

Looking for an interactive experience for your guests? A cupcake decorating station is a fantastic option! Set up a long table with an array of freshly baked cupcakes, assorted frosting options, and various toppings. From sprinkles to edible glitter, provide everything needed for guests to create their personalized cupcakes.
This fun activity not only enhances the dessert experience but also serves as a great conversation starter among guests. You could even offer awards for the most creative cupcake designs, adding a playful element to the festivities.
Ingredients:
– 2 cups all-purpose flour
– 1 1/2 cups sugar
– 1 cup butter, softened
– 4 eggs
– 1 cup milk
– Various frostings (vanilla, chocolate, cream cheese)
– Assorted toppings (sprinkles, chocolate chips, fruit)
Instructions:
1. Bake cupcakes as per your favorite recipe and cool.
2. Set up the decorating table with all ingredients displayed.
3. Allow guests to decorate their cupcakes with various frostings and toppings.
FAQs:
– Can I prepare cupcakes in advance? Yes, bake a day before and frost on the day of.
– How can I keep frosted cupcakes fresh? Store them in a cool area, covered with a cake dome.
Cupcake Decorating Station
Editor’s Choice


15. Edible Flower Cakes

Looking for a touch of elegance and freshness in your wedding desserts? Cakes adorned with edible flowers are a stunning choice. These natural decorations not only look beautiful but also add unique flavor profiles to your desserts. Choose a selection of cakes and cupcakes decorated with fresh blooms like pansies, violets, or roses that beautifully complement different cake flavors.
This idea adds aesthetic appeal and aligns perfectly with a rustic chic theme. The vibrant colors of the flowers against soft frosting create a captivating display, while the delicate flavors leave a lasting impression on your guests.
Ingredients:
– 4 cups all-purpose flour
– 2 cups sugar
– 1 cup unsalted butter
– 8 eggs
– 2 cups milk
– 3 teaspoons baking powder
– Assorted edible flowers (pansies, violets, roses)
Instructions:
1. Preheat your oven to 350°F (175°C).
2. Cream butter and sugar until light and fluffy in a bowl.
3. Add eggs one at a time, mixing well.
4. Alternately add flour and milk, mixing until smooth.
5. Pour batter into prepared cake pans and bake for 25-30 minutes.
6. Once cooled, decorate with frosting and arrange edible flowers artistically.
FAQs:
– How do I know which flowers are edible? Confirm that they are labeled as edible and preferably organic.
– Can I make these cakes in advance? Yes, bake a day ahead and add flowers just before serving.
Conclusion

Creating a wedding dessert table that impresses your guests is all about blending elegance with creativity. From tiered cakes and rustic pie tables to interactive s’mores stations and unique edible flower cakes, each idea brings a unique charm to your celebration.
These delightful desserts not only satisfy sweet cravings but also add a personal touch to your wedding day. As you curate your dessert table, remember to infuse your style, theme, and love story into each element. Your stunning display will leave a lasting impression, ensuring that your guests talk about your wedding long after the day is over.
Note: We aim to provide accurate product links, but some may occasionally expire or become unavailable. If this happens, please search directly on Amazon for the product or a suitable alternative.
This post contains Amazon affiliate links, meaning we may earn a small commission if you purchase through our links, at no extra cost to you.
Frequently Asked Questions
What makes a wedding dessert table elegant in a rustic chic setting?
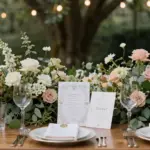
A truly wedding dessert table elegant look in a rustic chic setting comes from a cohesive palette, natural textures, and thoughtful displays.
Start with a soft color palette (ivory, sand, sage) and mix materials like wood, linen, and burlap. Use a variety of stands and cake pedestals to create height and interest, then group desserts by flavor or color to guide the eye. Leave breathing room to avoid clutter, and add warm lighting (string lights or candles) for a romantic glow. For an extra touch, incorporate elegant dessert displays like mirrored trays or vintage cake stands to elevate the look.
Finish with a signature dessert as a focal point to anchor your wedding dessert table ideas and ensure your presentation feels intentional and stylish.
How can I plan a luxury wedding dessert table without blowing the budget?
Planning a wedding dessert table elegant setup on a budget is totally doable. Start by selecting 3–5 signature desserts and a couple of “wow” displays, rather than an overwhelming spread, to hit your wedding dessert table ideas without overspending.
Rent premium dessert stands and glass cloches instead of buying, and mix DIY treats (cookies, cupcakes) with store-bought options to save time and money. Use cohesive packaging and signage to create a sense of luxury; simple greenery, gold accents, and clean white plates can transform affordable sweets into luxury dessert tables vibes. Finally, coordinate with your caterer or dessert vendor to batch-bake and plate efficiently to keep costs down while maintaining high impact.
What are some practical ideas for elegant dessert displays?
For elegant dessert displays, start with a central focal point and build layers around it. Use a mix of height using cake stands, crystal pedestals, and wooden risers. Create clusters by flavor or color for visual rhythm. Use signage and minimal greenery to tie the display to the rustic chic vibe. Incorporate a few interactive elements like a DIY drizzle station or a mini parfait bar. Label each item with clean typography to help guests navigate the table. Add lighting with fairy lights or candles to highlight textures like gloss glaze and matte finishes. This approach aligns with wedding dessert table ideas and ensures every plate looks intentional.
What are some unique wedding treats that wow guests at a rustic chic dessert table?
Consider a mix of textures and flavors that feel indulgent but approachable. Some ideas include mini bourbon pecan tarts, lavender crème brûlée jars, honey-lemon macarons, chocolate-dipped pretzels with flaky sea salt, and rosemary shortbread bites. Pair these with a rustic display—think wooden slabs, antique cake stands, and glass bells. Label each item with playful yet elegant tags, and rotate the menu with a few seasonal specials to keep it fresh. Incorporate unique wedding treats that fit your color story and your guests’ preferences to elevate the wedding sweets presentation.
How can I coordinate the wedding dessert table with venue and timing for a smooth night?
Start by looping in your venue and caterer early to confirm space, power needs, and the dessert bar style (self-serve vs. plated desserts). Build the timeline around dessert service, planning a late-night moment so guests can mingle around the table. Use consistent signage, napkin colors, and elegant dessert displays to tie the look to the rest of the reception. Don’t forget dietary restrictions; label gluten-free, nut-free, and vegan options clearly. Finally, practice a quick setup before the big day to ensure a seamless wedding dessert table elegant presentation that complements your rustic chic theme.
Related Topics
wedding dessert table elegant
rustic chic decor
luxury dessert tables
unique wedding treats
elegant dessert displays
wedding sweets presentation
seasonal dessert ideas
vintage style
DIY wedding desserts
guest impressing treats
wedding reception ideas
charming dessert setups